


Did you know that award-winning albums and videos can be made right at home? Just look at Billie Eilish—she created her hit debut album in her own bedroom. The same goes for video content. Whether you're producing YouTube videos, podcasts, online courses, or live streams, a home video studio can do the job. The best part? You can set up the perfect home studio for under $350 with smart planning and a few essential tools.
Setting up a video studio at home might feel overwhelming, but it’s totally doable. All it takes is a clear vision, the right equipment, and some creativity. For instance, lighting kits can start at just $56.99, and a high-quality microphone is crucial for clear audio. Ready to turn your spare room or corner into a powerful studio? Let us explore how to create the perfect home studio without breaking the bank.
Do You Really Need a Home Video Editing or Filming Studio?
With video content becoming more popular every day, many creators wonder: Do I really need a home video studio? The answer depends on how often you create videos and the quality you want.
If you only make videos once in a while, a full studio might not be necessary. But if you regularly create content for YouTube, social media, online courses, or work, a home studio can be a great help.
Having a home video studio—even a small one—offers some clear benefits:
Consistency: Once configured, a permanent setup maintains similar lighting, audio quality, and framing across all videos
Efficiency: Equipment stays ready without setup and takedown for each session
Professionalism: A controlled environment keeps out distractions and disruptions
Creativity: Ready equipment lets you record whenever inspiration hits
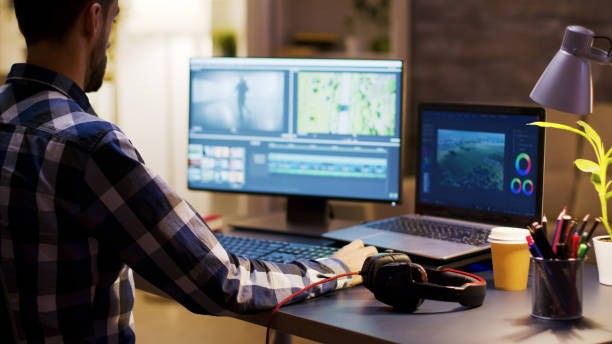
If you edit videos for hours, having a proper editing area helps. Working at a kitchen table on a laptop can get uncomfortable. A real editing setup—with a good chair, large screen, and organized storage—makes long sessions easier and faster.
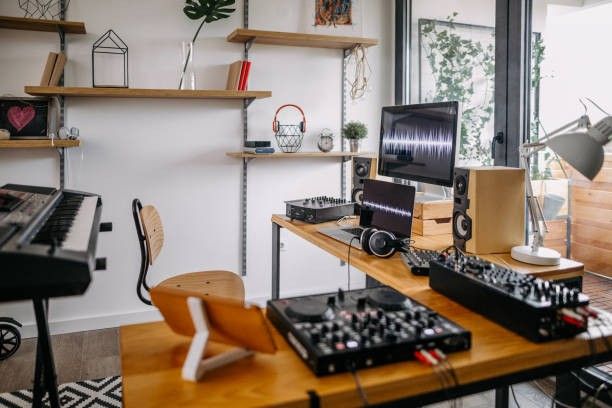
The word “studio” might sound like you need a big room with expensive gear, but that’s not true. Even a small corner in your bedroom or home office can work. Good lighting, a decent mic, and a clean background are often enough.
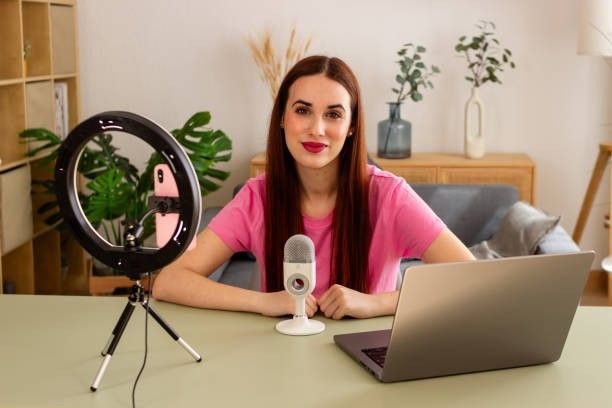
Not ready to create a full-time studio? No problem. Start with portable gear you can easily set up and take down. Many successful creators started with just a ring light and a smartphone.
Think about your goals. If you’re filming cooking videos, a well-lit kitchen may be perfect. If you’re doing interviews, you might need better lighting, audio, and maybe even two cameras.
Step 1: Planning Your Home Video Studio Setup
Planning is key when creating your home video studio. It helps you avoid expensive mistakes. Before buying any equipment, focus on planning the space. The size and features of your room will affect what equipment works best and how your videos turn out.
Choosing the Right Room and Space Layout
The first big step is choosing the right room. The space you need depends on the type of videos you make. For example, if you're just filming yourself talking, you won’t need much room. But if you do workout videos or product demos, you'll need more space. A 10x10-foot room is usually enough for basic setups. More space gives you more flexibility.
Choose a room based on these points:
Lighting control – Rooms with windows are nice but natural light changes during the day.
Quiet location – Avoid rooms near busy streets, kitchens, or loud appliances.
Power outlets – Try to have at least 4 to 6 outlets for lights, cameras, and audio equipment.
Neutral wall colors – Light gray or blue works well and won’t reflect weird colors on you.
Also, think about how the room will be used. If it’s just for videos, you can leave your setup ready all the time. If you use it for other things, choose equipment that’s easy to pack up and set up again.
Factoring in Lighting, Noise, and Background Elements
Lighting is one of the most important parts of a good video. If you're using natural light, north-facing windows give soft, even light. But artificial lights like softboxes or LED panels give you full control. If you’re using window light, check how it changes throughout the day so your lighting stays consistent.
Sound is just as important as lighting. Try to pick a room away from noisy areas. Sounds from the fridge, AC, or cars outside can ruin your audio. Carpet, curtains, or foam panels help absorb sound and make your voice clearer.
Your background also matters. A plain wall is safe and clean. A shelf or some artwork can add personality, but be careful they don’t distract viewers. Try to record with some space between you and the background—it gives a nice depth to your shot.
High ceilings are great for placing lights and help reduce echo. Low ceilings can cause sound to bounce and limit where lights can go.
Before you buy any equipment, draw a simple map of your room. Mark where the camera, lights, and people will go. This will help you know what fits, where to put things and how to move around safely during filming.
Step 2: Essential Equipment for a Home Video Studio
Setting up a home video studio doesn’t have to be complicated. With the right equipment, even beginners can produce high quality videos. Here’s what you need for a polished and professional setup.
Camera Options – DSLR to Streaming Cameras
Your camera sets the tone for your videos. DSLRs and mirrorless cameras offer great image quality and flexible lens options but can be expensive for beginners. A great middle ground is a 4K streaming camera for webcam use – it’s plug and play, DSLR quality and works seamlessly for content creators.
If you want high end visuals with Zoom, the 10X Optical Zoom Wireless Streaming Camera is perfect for product demos or live shows. For serious streamers, check out Streaming Kit or Game Streaming Kit for tailored setups.
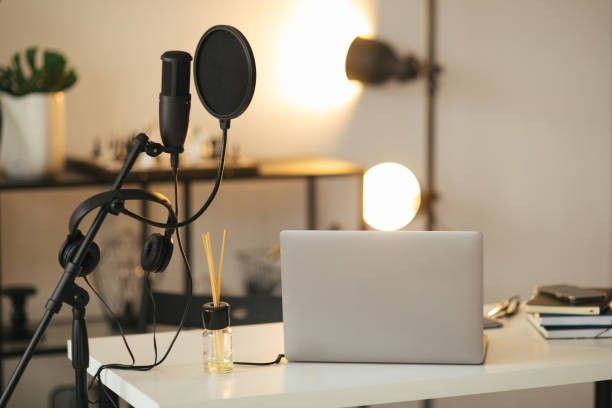
Microphones – Clear Audio That Connects
Clear audio keeps your audience engaged. A simple and affordable start is the USB microphone for streaming and podcasting – it’s easy to connect and great for voice clarity. For more advanced setups, go for the USB and XLR condenser microphone, which is perfect for live sessions and studio recordings.
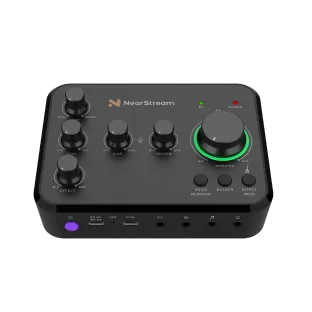
Need mobility? The Wireless Microphone lets you move around while capturing crisp audio. A Portable Audio Mixer makes your audio setup more versatile, allowing you to manage multiple sources or guests. You can also check out the Podcasting Kit to cover all bases.
Lighting Setup – Ring Lights, Softboxes and Natural Light
Good lighting makes a huge difference in video quality. Ring lights provide even light that flatters your face, perfect for video calls or vlogs. Softboxes spread light more naturally, reducing shadows and making your background look cleaner.
If you’re shooting during the day, face a window to use soft natural light. Combine these tools with your chosen streaming kit to easily produce pro-quality visuals.
Tripods, Mounts and Camera Angles
Stable video is key to looking professional. Use adjustable tripods to frame your shots properly and reduce camera shake. Ceiling or boom mounts work well for dynamic shots like overhead views in cooking or crafting.
Try the 4K60 USB 3.1 Capture Card to connect DSLR or game console footage directly to your computer without lag. Eye level shots create a connection with your audience, while slightly higher angles are often more flattering.
Step 3: Software & Accessories for a Home Editing Studio
Your home video studio needs both equipment and software. To make great videos, you need easy to use editing tools and a space that feels comfortable. A good home video editing studio helps you work faster, stay organized and be more creative.
Computers and Video Editing Software Essentials
Your computer is the heart of your editing studio. It must be powerful enough to handle large video files and demanding programs.
For basic editing, you’ll need a computer with at least an Intel 6th Gen or AMD Ryzen 1000 series processor and 8GB of RAM.
For 4K editing, go for something stronger like Intel 11th Gen or newer with 32GB of RAM.
Fast storage is also important. Use an SSD (Solid-State Drive) to make your programs run faster, and keep your video files on a separate high-speed drive to avoid delays.
If you’re a Mac user, look for models with Apple’s M1 Pro, M1 Max or newer chips. These work well for editing, especially if they have at least 16GB of unified memory. Also, a good graphics card helps – aim for one with at least 2GB of memory or 8GB if you’re editing in 4K.
Top Free and Paid Editing Tools
There are many great video editing programs out there – some are free, others cost money.
Adobe Premiere Pro is a professional editing tool that many people use. It’s powerful but requires a monthly subscription.
Final Cut Pro is a great option for Mac users. You only pay once and it has all the tools you need.
DaVinci Resolve is an excellent free option. It includes editing, color correction, visual effects and audio tools all in one.
Beginner friendly options like Clipchamp (online), iMovie (for Mac) and PowerDirector are good places to start if you’re new to editing.
Before you choose, make sure the software works well with your computer. Some tools, like DaVinci Resolve, need a strong graphics card, while others rely more on the processor.
Monitor Setup and Ergonomic Accessories
A good monitor helps you edit with more accuracy. Choose a screen with at least 1080p resolution—4K is better for detailed work.
For true colors, get a monitor that covers 95% of the DCI-P3 color range. Two screens make editing easier: one for tools and timelines and the other for video previews. Don’t forget comfort. Use an adjustable chair with back support. Keep your monitor at eye level and your mouse and keyboard within reach. Add wrist rests, footrests, and good lighting for long editing sessions.
Experts recommend at least 100 Mbps for smooth performance, especially when multiple devices are streaming simultaneously. Hardwired Ethernet connections are more stable than WiFi, so they’re the go-to choice for professional streamers.
Premium Setup: Building a Home Studio for Video Streaming
Live streamers who want to upgrade their simple home video studio to a premium streaming setup should pay attention to technical details that ordinary recording setups might miss. You'll just need specific tools designed for live content delivery to create broadcast-quality streams.
Internet Speed and Streaming Requirements
A reliable internet connection is the foundation of any streaming setup. Different streaming resolutions just need specific minimum upload speeds:
Resolution | Recommended Speed |
4K UHD | 20+ Mbps |
HD 1080p | 5+ Mbps |
HD 720p | 2.5+ Mbps |
SD 480p | 1.1+ Mbps |
Experts recommend at least 100 Mbps for consistent performance, especially when you have multiple devices streaming at once. Hardwired Ethernet connections provide better stability than WiFi, making them the go-to choice for professional streamers.
Software for Streaming: OBS, Streamlabs and More
Streaming platforms require software beyond basic screen recording. OBS Studio is the go-to tool for most pros—free, open-source, and light on system resources. Its flexibility and plugin support makes it ideal for those who want total control over their stream.
Streamlabs simplifies things with built-in features like alerts, overlays and donation tools. While it’s more beginner friendly it can strain lower end systems. Choose OBS for performance or Streamlabs for ease—both deliver reliable results depending on your needs.
Streaming Kits to Level Up Your Studio
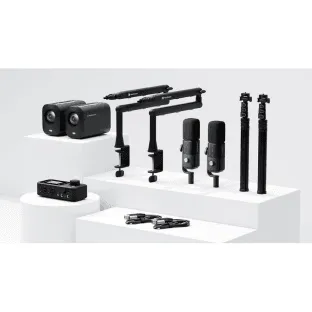
If you’re building a professional grade streaming space investing in a full streaming kit is the smart move. Nearstream’s streaming kit combines every key component you need: a USB or HDMI capture card, a studio quality microphone with an audio interface and a tactile stream controller. All parts are tested to work together so you won’t waste time troubleshooting audio or video syncing issues.
How Our Streaming Kit Makes Your Life Easier
The Nearstream Streaming Kit is designed to eliminate the headaches that come with DIY setups. With all components tested to work together, you won’t waste time troubleshooting audio or video syncing issues.
The kit includes multi-bitrate streaming features which adjust the video quality based on each viewer’s internet connection. This ensures a consistent and enjoyable experience for your entire audience—no buffering, no lag, just clean, professional streams.
Design Tips to Make Your Studio Look Professional
Your home video studio's appearance plays a huge role in how viewers see your content quality. Even if you have the best equipment, a messy or unprofessional setup can hurt your credibility. These design improvements can transform any space into a professional production environment.
Soundproofing for Cleaner Audio
Good soundproofing needs more than just foam panels on walls. You need to combine absorption to trap sound waves, damping to remove vibrations, decoupling to separate structures, and filling gaps. Budget-friendly options start with heavy curtains or blankets on walls that cut down echo. Thick rugs or carpeting help reduce floor reflections and footstep noise.
Simple door changes can make a big difference. Door sweeps block sound from coming underneath, and weather stripping seals gaps around the frame. Note that soundproofing is different from acoustic treatment—soundproofing keeps outside noise away, while acoustic treatment improves sound inside the room.
Using Backdrops or LED Panels for a Signature Look
A clean, consistent background will raise your production value right away. Wrinkle-resistant fabric backdrops with built-in grommets are portable and durable enough for regular use. Canvas backgrounds look just like classic painted backdrops, with a non-reflective matte finish that won't tear and fits easily in travel tubes.
LED panels give you a more modern look with dynamic, customizable backgrounds. These panels let you adjust brightness and color temperatures to control your visual environment precisely. Unlike regular backdrops, you can change LED panels between shoots or even during videos.
Cable Management and Workspace Organization
Tangled cables all over your studio floor scream "amateur setup." Here are some simple solutions that work:
Velcro tie-wraps give you reusable, adjustable organization without squeezing too tight
Cable sleeves combine multiple cables into single, manageable bundles
Cable boxes hide power strips and extra cable length in neat containers
Adhesive hooks and clips guide cables along walls and furniture edges
Keep power and audio cables apart to avoid interference that can hurt signal quality. You can use screw-in hooks to attach cables to desks or dedicated organizers to store unused cords. A neat cable system looks professional and makes your studio safer by removing tripping hazards.
Optimizing for Different Types of Video Content
Each type of video content requires a tailored setup to achieve the best production quality and audience engagement. Whether you’re creating long-form content, podcasting, or filming short clips, using the right equipment is essential.
YouTube Recording Studio Setup
YouTube demands high production quality to keep viewers engaged. A DSLR-quality optical streaming camera like NearStream 4K VM20 offers crystal-clear visuals and doubles as a webcam. For creators who need more versatility, the 10X Optical Zoom VM33 is ideal for dynamic shots.
Pair your setup with softbox lighting or a ring light, and use a teleprompter for smoother delivery. Want an all-in-one solution? Explore the NearStream YouTube Streaming Kit for a complete setup.
Home Studio for Podcasts and Interviews
Sound is everything in podcasting. A solid microphone like the USB & XLR Condenser Mic combined with a portable audio mixer enhances clarity and control. Use soft furnishings and acoustic treatment to minimize echo and outside noise.
Whether you're just starting out or going pro, the NearStream Podcasting Kit includes essential equipment and accessories.
TikTok and Short-Form Video Content Setup
Short-form video requires speed and portability. Use your smartphone paired with a compact ring light for even lighting. For better audio on the go, consider a wireless microphone that captures clean sound without cables.
If you're looking to upgrade your visuals, the 4K VM20 streaming camera is portable and offers professional quality. Don’t forget the 4K60 USB 3.1 Capture Card if you're integrating with consoles or DSLR cameras for more complex shots.
Budgeting Tips for a Cost-Effective Studio
Setting up a home video studio needs smart financial planning. You don't need to empty your savings account to create a good workspace. Quality content can come from simple setups with smart investments and creativity.
What to Prioritize When You're Starting Out
The first thing to invest in is audio equipment. Poor sound can instantly turn viewers away—even if your visuals are great. Start with a reliable microphone like the USB & XLR Condenser Microphone, which offers excellent sound quality without a high price tag. Pair it with a portable audio mixer for better sound control.
Next, focus on lighting. Natural light is your best free resource—just film facing a window. For consistent results, invest in a basic lighting kit. Affordable LED or ring lights significantly improve your look and are compact enough for tight spaces.
Before buying new equipment, test what you already have. Many smartphones now shoot in 4K and, with good lighting, can match more expensive cameras. You might be surprised at how much you can achieve with minimal upgrades.
Where to Save Without Sacrificing Quality
There are smart ways to cut costs without reducing your content quality:
DIY setups: Use household items creatively. Stack books to replace tripods or use desk lamps with white fabric as diffused light sources.
Multi-use spaces: Convert a quiet room corner or shared space into a temporary studio. Add a backdrop or rearrange furniture when filming.
Free editing software: Save on software by using free tools like DaVinci Resolve or YouTube Studio’s editor—they’re powerful enough for beginners and intermediate creators alike.
Bundle kits: Consider all-in-one kits like NearStream’s Podcasting Kit or YouTube Streaming Kit, which offer curated equipment at a better value.
Keep your content goals in mind—whether it’s interviews, tutorials, or gameplay—and let that guide your purchases. Build slowly, upgrading only when necessary. This way, your studio evolves with your skills and audience without draining your wallet.
Conclusion: Testing and Improving Your Setup Over Time
Creating the perfect home video studio doesn’t require a huge budget—just smart planning, consistent testing, and gradual upgrades. Start with the essentials like quality audio and lighting, then build your setup based on the type of content you produce.
Whether you're filming YouTube videos, podcasts, or short clips, your studio should grow with your skills and needs. Regularly evaluate your setup to find areas for improvement and adapt as your content evolves. Remember, professional results come from thoughtful choices, not just expensive equipment.
Ready to build your own home video studio? Explore reliable, budget-friendly streaming kits and equipment at Nearstream today!
FAQs – Home Video and Editing Studios
Can I build a home video studio in a small space?
Yes, you can! Many creators build effective video studios in tight spaces like bedroom corners, closets, or small offices. Use compact equipment such as wall-mounted lights, desktop tripods, and foldable backdrops to save room. With smart placement, you can create a professional setup under $1,000 that’s ready to go whenever creativity strikes.
What’s the difference between a filming studio and an editing studio?
A filming studio is where content is captured using lights, cameras, and mics in a controlled space. An editing studio, on the other hand, is where footage is refined. It’s built around a powerful computer, editing software, and a comfortable setup. Filming focuses on getting clean visuals and audio while editing polishes that content for viewers.
How do I make my home studio look professional on camera?
Start by blocking out natural light to avoid changes during filming. Create depth by standing away from the background and using intentional lighting, like a lamp or LED strip, to add character. Choose clothing that contrasts with your backdrop, and style the set with decor that reflects your brand. Simplicity often creates the cleanest, most professional results.