


Live streaming is a popular and versatile medium, and YouTube provides an excellent platform for beginners. With its user-friendly interface and vast audience, it’s easier than ever to start your live streaming journey. Our blog post breaks down the process of live stream on Youtube into manageable steps, from setting up your channel to going live. Whether you’re an aspiring vlogger, an educator, or someone eager to share their passion, this guide is for you. Dive in and start your live streaming adventure today!
Create a YouTube channel
1. It’s necessary to possess a Google account and be logged in on YouTube.
2. Select your profile picture in the upper-right corner and opt for the My channel option to create a new channel.
In case you manage multiple YouTube channels, you have the ability to alternate between them at this location. You have the option to set up an account for your trademark, or merely select a Brand Account if you’ve been assigned as a manager to one.
Enable live streaming
- You need to click ”Create” and then”Go live”.
- To live stream, you need to have no live streaming restrictions in the past 90 days and you need to verify your channel.
- Starting your first live stream may take up to 24 hours. Once enabled, you can live stream instantly.

Choose a way to stream
You can broadcast live videos on YouTube in three ways:
Mobile
Mobile broadcasts are excellent for impromptu vlogs and updates, offering a more relaxed environment. Be aware that you require a minimum of 50 followers on your channel to initiate a live stream from YouTube’s mobile application. If you’re aged between 13 and 17, you need at least 1,000 followers.
Notice:
For YouTube users aged 13 to 17, your default mobile live stream privacy setting is configured to be unlisted. If you’re 18 or older, your default mobile live stream privacy setting is configured to be public. You have the option to modify this setting to make your live stream public, private, or unlisted.
Here are the specific steps:
- At the bottom, choose the Create symbol and select Go live.
- Proceed with the instructions to establish a live stream.
- To configure settings for live chat, age restriction, monetization, and more, tap More options, then Show more. Afterward, tap Next.
- To broadcast your phone’s display, tap Create channel, then Share screen.
- Tap Go live.
- To conclude your stream, tap Finish. A record of the stream will be generated on your channel. You can modify the privacy setting or erase the archive whenever you wish.

Webcam
YouTube features a live streaming platform that can be initiated from your internet browser, linking to your computer’s webcam. It offers a swift and straightforward method to commence streaming, although the quality of your stream might be less controlled compared to using an encoder. Here is a brief video to assist you in understanding these steps, and for a written guide, please refer to the subsequent paragraph.
https://www.youtube.com/watch?v=x093icDD-Oo

Here are the specific steps:
- In the upper right, click Create ,then Go Live.
- From the left, select Webcam .
- Enter a title and description, and select a privacy setting
You can Click More options and Advanced Settings for more settings..after finished ,Click Next. Your camera will then take a thumbnail.
4. Make sure you’ve chosen the correct webcam and microphone. And Click Go Live.
5. To manage your stream, like add tags, change monetization and chat settings, and more, click Edit. You can change these settings at any time, whether your stream is live or not.
6. When you’re done streaming, click End Stream at the bottom.
The above settings are for the webcam on your laptop or computers, but if you want to upgrade the quality, you may look at this video, showing how to use a camera as a webcam during live streaming. It is easy to connect just like an extension of your computer, and the set up methods are roughly the same as the tips of live streaming on a webcam. Here is an example of how to connect your camera as a webcam:
https://www.youtube.com/watch?v=7nQ5KMMfi20&t=9s
Encoder
- Share your screen or broadcast your gameplay
- Use external audio and video hardware
- Manage an advanced production (like a few cameras and microphones)
Using an encoder (also known as streaming software) gives you more control over your live stream. The setup is a little more involved than mobile or webcam streaming, but once you get the hang of it you can produce higher-quality streams.
Here are the specific steps:
- Install an encoder
- An encoder converts your video into a digital format to stream on YouTube. Some encoders are software apps on your computer, while others are standalone hardware.
- If you’re using hardware, like a webcam, a microphone, or a headset, connect them and make sure they’re set up with your encoder.


2. Create a stream on youtube
- Navigate to YouTube Studio.
- From the upper right, select Create then Go Live to launch the Live Control Room.
- Select the Stream tab.
If it’s your inaugural live stream: Modify your stream and click Create stream.
If you’ve live streamed previously: Your prior stream settings will be loaded, inclusive of your stream key, which implies you won’t need to refresh your encoder.
- accomplish your settings on your encoding software
- Within your encoder stream settings, if you spot the option to stream to YouTube, choose that. Otherwise, duplicate the stream URL from YouTube and paste it into your encoder’s Stream settings server. It might be labeled as an RTMP server.
- Duplicate the stream key from YouTube and paste it into your encoder’s Stream settings where it indicates Stream Key.
- Configure your encoder, then initiate the stream with your encoder. A viewing page is now established for your stream, and you’re presently live on YouTube.
- To conclude the stream, cease transmitting content from your encoder. All streams under 12 hours will be automatically archived
It may sound simple, but connecting encoding software with YouTube is not an easy task, as it involves many specific settings of the related software. Usually, the relevant software will provide corresponding operation guides. Here is a simple and clear video that introduces how the Live Stream camera NearStreamVM33 connects to YouTube and starts live streaming. With a more concise interface setting and a rich selection of streaming connections, a professional live streaming camera makes streaming more accessible.
https://www.youtube.com/watch?v=XQYp3OdBJjs&list=PLIrsEvbPensR-BPbcoiYp2dTv-4WO-3Fo&index=10
Tips for streaming on YouTube
Seeking additional methods to enhance your live YouTube broadcast? Here are some suggestions that will assist you in making a strong start with your broadcast:
1. Select the most suitable content for your channel. Common types of live videos on YouTube encompass instructional streams and product demonstrations, product launches, flash sales, interviews, Q&As, AMAs, and live events.
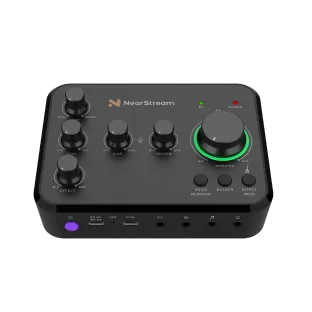
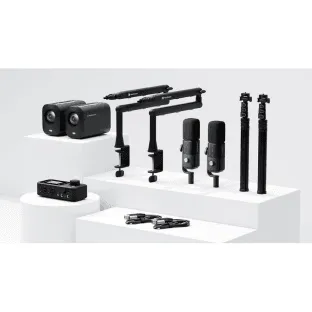
2. Bear in mind that the more intricate your live video is, the more you’ll need to invest in equipment. Acquire the appropriate live streaming gear. Your live videos require respectable production quality if you aim to draw viewers. Obtain a high-quality camera and a tripod or stand for it. A Live Streaming camera specifically designed for live can simplify your live-streaming initiation, providing you with the finest video and sound quality. Also, contemplate investing in an external microphone, capture card, and encoder.

3. Be mindful of the battery levels. Connect your gear to a power source if it’s feasible and convenient. For the gear you can’t plug in, ensure to fully charge the batteries before going live. Have backup batteries available. If your gear has a long battery life, that’s preferable.
- Don’t neglect the audience. YouTube Live allows you to interact with your audience directly. This is why live streaming is an engaging form of content.
- Track your YouTube streaming performance. After your YouTube broadcast ends, take a look at the metrics to check out peak viewers, stream time, and other important numbers to help you do better on your next stream.
- Multistream. Don’t limit yourself to one platform. YouTube is awesome, but if you have a following on other networks too, it might be better to multistream to different platforms that are convenient to your followers than to try to haul the audience over to YouTube.
Conclusion
Live streaming on YouTube is not difficult as long as you have the basic tools and understand the basic operation methods. Once you get the hang of it, you can use equipment such as cameras and microphones, as well as software that assists in live streaming, to enhance the quality of your live stream. I hope you can find a live streaming method that suits you and explore this new process!